Tuesday, November 17, 2020

micro:bit V2 - key information


Version 2 of the BBC micro:bit was released very recently. It has new capabilities, such as a speaker and microphone for audio capture and sound generation but it retains many of the things we came to know and love in V1 of the micro:bit, including Bluetooth. Most importantly, it has way more memory. 

Thanks for the Memory

V1 had only 16Kb RAM and the standard runtime code known as the DAL plus the Bluetooth software stack from Nordic Semiconductor consumed 14kb or 15kb depending on configuration. This meant that you were only able to contribute very small amounts of your own code, a serious constraint. 

V2 of the micro:bit has a whopping 128Kb RAM which has tremendous implications for what you can get done with the new device. Not only will you be able to write much more substantial code for your micro:bit, but you will be able to use Bluetooth in previously impossible ways. Micro:bit V1 could only act as a Bluetooth GAP peripheral whereas V2 can be a GAP peripheral, GAP central or.... both (see references below). In simple terms this will mean that micro:bits will be able to communicate directly with other micro:bits. And Bluetooth has far better range and reliability than the vanilla "radio" technology.

Compatibility

It's important to note that hex files created prior to coding editors being updated to support micro:bit V2 will continue to work on a V1 micro:bit (obviously) but will not work on a V2 micro:bit. To get your favourite code working on a V2 micro:bit you will need to regenerate the hex file from your source code using a version of coding editor that supports micro:bit V2. Currently, the makecode beta editor supports V2 but the production web site does not (yet). 

Significantly, the hex file format has been changed and the new format is known as the universal hex. This format works on both V1 and V2 micro:bit hardware (subject to memory limitations and hardware features used). So, the best course of action is to rebuild your old scripts so that you have hex files which will work with both micro:bit versions. That's what I'll be doing with the Bitty Software open source code examples. 

But how can you tell which type a hex file is? It's quite simple. A v1 format hex file is about 700Kb in size but an equivalent universal hex format file will be about 1.8Mb.

Codal

Micro:bit V2 uses new runtime code known as Codal. It serves the same purpose as the DAL on a V1 micro:bit, providing drivers and a framework and APIs which make it easier to create your own applications. 

Bluetooth

Micro:bit V1 had a pretty old version of Bluetooth Low Energy (LE), compliant with version 4.1 of the Bluetooth core specification which was released back in 2013. Bluetooth has changed in many ways since then.

Micro:bit V2 has a version Bluetooth LE which is compatible for version 5.1 of the Bluetooth core specification. Version 5.0 added some amazing capabilities to Bluetooth including the ability to communicate over a range of about 1 kilometre using something called the LE Coded PHY. Such capabilities are optional however, so a device with 5.0 or later compatibility does not necessarily have all of the features in that or later releases. From a quick glance at the documentation for the Nordic Semiconductor S113 stack which is used by Codal, it looks like the long range LE Coded PHY capability is not supported. That's a shame.

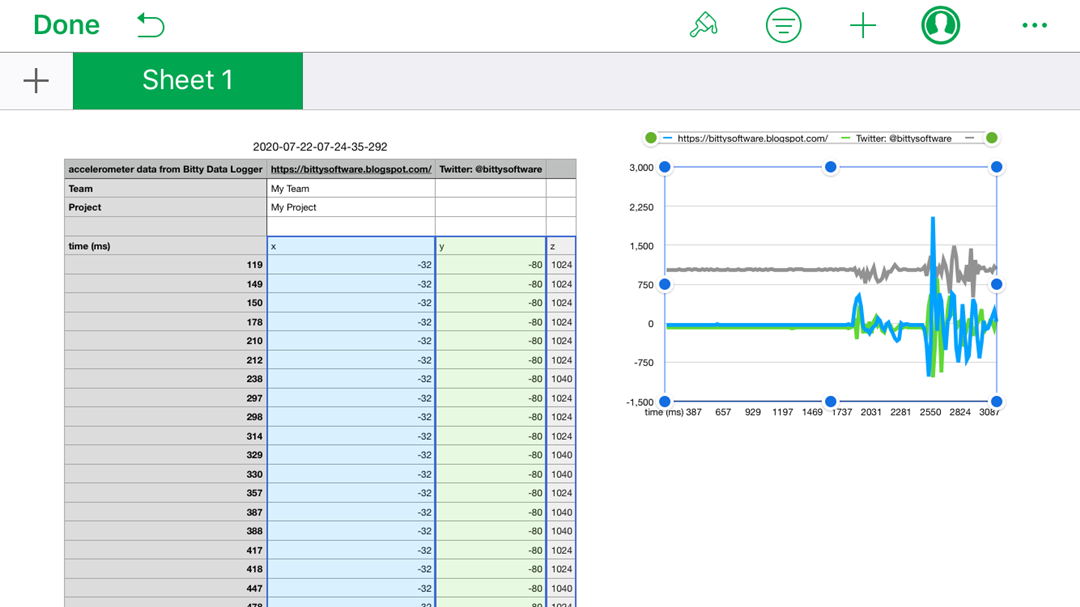
The collection of Bluetooth services that constitute the device's Bluetooth profile, have been reimplemented in Codal. This is great news because it means applications such as Bitty Data Logger will continue to work unchanged and unaware that the remote device is a V2 or V1 micro:bit.

I did some basic testing and was largely successful. I found and reported a few glitches which I expect will be fixed soon. Here are my test results:

Issue 28: bluetooth all services hex file has an issue (long standing, I imagine).  The magnetometer service does not transmit compass bearing data. The sample code probably needs to calibrate the magnetometer at start-up.

OK: accelerometer service 

OK: magnetometer service (provided the magnetometer is calibrated first)

Issue 26:  button service - Notifications rarely sent on button A long press. Worked once on button B but never subsequently. A single click and release (short press) works and transmits a value of 1 as expected, but holding the button down for 2 seconds or more (long press) does not transmit anything (expected a value of 2).

OK: event service 

OK: LED service

OK: Temperature service 

OK: UART service

Issue 27: IO Pin service not working -  Switching on pin 0 (and perhaps others) does not work. Tested by connecting an LED to pin 0 and then writing 0x000101000200 to the pin data characteristic. 

Conclusion

micro@bit V2 looks absolutely tremendous and I'm looking forward to seeing the impact it has!

Reference Material

micro:bit V1 technical specifications: https://tech.microbit.org/hardware/1-5-revision/ 

micro:bit V2 technical specifications: https://tech.microbit.org/hardware/ 

GAP peripheral? GAP central? Bluetooth roles and micro:bit

Makecode beta site for V2 micro:bit hex file generation: https://makecode.microbit.org/beta# 

Bitty Software code examples: https://github.com/bittysoftware 

Lancaster University DAL source: https://github.com/lancaster-university/microbit-dal

Lancaster University Codal source: https://github.com/lancaster-university/codal-microbit-v2

Nordic Semiconductor S113 Bluetooth LE stack: https://infocenter.nordicsemi.com/index.jsp?topic=%2Fstruct_nrf52%2Fstruct%2Fs113.html

Wednesday, July 22, 2020

Using Bitty Data Logger without internet access

One of the nice things about Bitty Data Logger is that you can use it without needing access to the internet. You can capture and chart data over Bluetooth from your micro:bit, export the data locally on your smartphone and then view it in a suitable application. This article will run through the basic process.

1. Scan and Connect

As usual, you must first scan to discover your micro:bit and then select it from the list of devices to connect to it.

Scanning for micro:bits. Select to connect.

2. Settings

Next, go into the Settings screen and ensure the right options are selected. The application will do its best to choose defaults which make sense given whatever code you are running on your micro:bit.

Select appropriate settings from the Settings screen

3. Capture some data

Press the Start button, capture some data from your micro:bit and then press Stop when you've captured enough.

Data capture

4. Review results and export

Go into the Results screen. You'll see your data at the top of the list of results files. Select your results file. If this is the first time you have viewed a results file, you will be asked to set an export preference. You can always change this in the Options screen by the way. To use your data offline, one of the easiest options is to select Save Locally.

Save Locally is a good export option for use with no internet access required

You could also use Copy/Paste so that data can be copied to the clipboard and then pasted into another application running on your smartphone. Alternatively, the Share option will allow you to select another application to send the data directly to when you export.

Note that the options offered under Data Export Preferences will vary depending on whether you are running on Android or iOS. The image above is a screen shot from Android. Here's what the same screen looks like on iOS.

Data Export Preferences on iOS

5. Using the Save Locally export option on Android

In the data results viewer screen, select Save Locally.

Save Locally on Android

A message will tell you where your data was saved.

Find the Downloads application or another file system browser application and launch it.

The Download application

Find your file, select it with a long press and then select Open With from the menu.

Select Open With to choose the application with which to view your data

Open with Google Sheets or similar.

Google Sheets works very well with Bitty Data Logger data

Your data will be presented, in this case within Google Sheets. Select a range of data to draw a chart.

Select a range of data for charting

Select the + button and add a suitable chart.

Add a chart

6. Sharing data with Apple Numbers

If you're running on an iOS device, the Apple Numbers spreadsheet application is a good tool for viewing your data. Select Share as the preferred data export option as shown above. View your results file and select Share to export it.

Select Copy To Numbers

Select Copy to Numbers to have your file copied into a new Numbers spreadsheet.

Your data after copy to Numbers

Select a data range.
Select a range of data for charting
Select the + button and add a chart.

Select a suitable chart type


Voila! Your chart will appear

7. Conclusion

Bitty Data Logger works very well without internet access. Good luck with your next project!


Friday, December 13, 2019

Bluetooth communication roles

Bluetooth devices will play one of 4 possible Bluetooth roles as defined by that masterpiece, the Bluetooth core specification. The four roles are called

Peripheral
Central
Broadcaster
Observer

These terms are part of "GAP", the Generic Access Profile, which is a part of the Bluetooth architecture.

A Peripheral advertises, inviting and (perhaps) accepting connections from Central devices. 'Advertising' means transmitting small amounts of data, quite frequently, which other Bluetooth devices can receive and act upon if they think the advertising device is of interest.

A Central device scans, looking for advertising packets and based on their content, may decide to connect to a device it thinks is suitable.

A Broadcaster is like a peripheral in that it advertises but it does not accept connections. It's sole purpose is to advertise.

An Observer scans and processes advertising packets but never tries to connect to another device.

Examples:

The BBC micro:bit is a Peripheral.

A smartphone is typically a Central but some newer devices can also act as Peripherals with the right application software running.

A Bluetooth beacon (iBeacon, AltBeacon, EddyStone and so on) is a Broadcaster.

A beacon application on a smartphone which alerts you to special offers broadcast by beacons for example, is an Observer.

A Peripheral cannot create connections, only accept them. Therefore a Peripheral cannot connect to another Peripheral. A Peripheral cannot scan for advertising packets from other devices, only transmit them. Therefore two Peripherals cannot interact using advertising data only.

The outcome of this is that one micro:bit cannot talk to another micro:bit *directly* using Bluetooth. You'd need a Central mode device acting as a hub and relaying messages between micro:bits.  My Heart Rate Monitor video shows a smartphone acting as a Central hub which is connected to two Peripherals, a BBC micro:bit and a heart rate monitor.

Technically, a device like the BBC micro:bit could have the ability to be either (or both) a Peripheral and a Central but there's just not enough memory available on the micro:bit to squeeze the larger Bluetooth stack that would be required to support both GAP roles, at least not when you are using the official DAL firmware that is. Other SDKs which allow you to program a micro:bit may be lean enough to make this possible.

That's it. An introduction to Bluetooth GAP roles and their relevance to BBC micro:bit. Amaze your friends at your next dinner party ;-)


This post has been reproduced and slightly tweaked from an equivalent article I wrote for another of my blogs a long time ago.

Saturday, June 22, 2019

Bitty Data Logger 4.0

Today marks the release of a new version of Bitty Data Logger for Android and iOS. BittyWeb users, don't worry.... the new release will be with you soon.

So what's new in this release and why were these changes made? Let's take a quick walk through:

1. User Code Capture Mode

The concept of 'capture mode' has been introduced. For the accelerometer, magnetometer and temperature data sources, the choices of capture mode are AUTO and USER CODE. For general data (previously known as 'pin data'), the choice is restricted to USER CODE.

AUTO Capture Mode
This represents the way in which data was acquired from the accelerometer, magnetometer or temperature sensor previously. Your remote device (e.g. a micro:bit) must have the Bluetooth accelerometer, magnetometer or temperature services in its code, typically achieved with a single block in MakeCode and.... well, that's it. You don't really need to do anything else since those services will take care of sampling data from the associated sensor and transmitting it to Bitty Data Logger automatically.

AUTO capture mode is the mode to use unless you have a good reason not to.

USER Code Capture Mode


User Code capture mode is available for all data sources


In the new User Code Capture Mode, your code on the remote device is responsible for acquiring data from wherever it might be, calculating it or deriving it in some other way - the choice is entirely yours. Your code must also transmit it over Bluetooth using the UART service, and in the correct format. 

Think of the UART service as allowing you to send and receive messages or byte arrays. It can handle any data, subject to a maximum message length of 20 bytes. A special set of messages have been defined for communication with Bitty Data Logger and you can find details in the new Bitty Software GitHub repository.

Any of the four data types (accelerometer, magnetometer, temperature and 'general data') can be acquired using USER capture mode. General data can only be acquired using USER Code Capture Mode, though.

Motivation and Benefits

So, why was this change made?

USER Code Capture Mode allows you to separate capturing data from transmitting it over Bluetooth. This could mean, for example, that you could write some code for your device which captures data and stores it to a file system as it is being captured. Later, perhaps when a button is pressed or when a Bluetooth connection is established, you'd then read through the stored data and transmit it to Bitty Data Logger. This would be useful in situations where you want to place your device somewhere that it is not practical to have a Bluetooth connection to a smartphone, such as in the great outdoors!

How do you transmit data in user capture mode?
The Bitty Software GitHub repository has lots of code examples. But here's one of them, showing simulated 'general data' being acquired and then transmitted using the UART service.


let connected = 0
bluetooth.onBluetoothConnected(function () {
    connected = 1
    starttime = input.runningTime()
})
bluetooth.onBluetoothDisconnected(function () {
    connected = 0
})
let message_type = 0
let timestamp = 0
let starttime = 0
let value1 = 0
let value2 = 0
let value3 = 0
let value4 = 0

bluetooth.startUartService()
let message = pins.createBuffer(11);

function transmitData() {
    timestamp = input.runningTime() - starttime
    message.setNumber(NumberFormat.Int8LE, 0, message_type);
    message.setNumber(NumberFormat.Int32BE, 1, timestamp);
    message.setNumber(NumberFormat.Int16BE, 5, value1);
    message.setNumber(NumberFormat.Int16BE, 7, value2);
    message.setNumber(NumberFormat.Int16BE, 9, value3);
    bluetooth.uartWriteBuffer(message)
}
basic.forever(function () {
    if (connected == 1) {
        message_type = 1
        // random numbers used solely for demonstration purposes. Acquire your data here as required.
        value1 = Math.randomRange(0, 1023)
        transmitData()
        message_type = 2
        // random numbers used solely for demonstration purposes. Acquire your data here as required.
        value1 = Math.randomRange(0, 1023)
        transmitData()
        message_type = 3
        // random numbers used solely for demonstration purposes. Acquire your data here as required.
        value1 = Math.randomRange(0, 1023)
        transmitData()
        message_type = 4
        // random numbers used solely for demonstration purposes. Acquire your data here as required.
        value1 = Math.randomRange(0, 1023)
        transmitData()
    }
    basic.pause(1000)
})

It may also be easier to implement the UART on devices which do not automatically have it, like the BBC micro:bit does, than implementing each of the other services.

Note: The Bluetooth Event Service is no longer used for transmitting general data (previously known as 'analog pin data'). You will need to change existing code to use the UART service instead, as shown above.


2. Pin Data is now called General Data

Previous versions supported Analog Pin Data as a data source. The original idea was that you would connect something like a sensor to one of the 3 analog pins numbered 0, 1 or 2 on the edge connector of a micro:bit and that data would be sent as micro:bit 'events' to Bitty Data Logger. It became apparent that people wanted to capture data from other sources, other pins for example. This was technically possible already but meant you might use pin data #0 as a container for data acquired from pin 9, which worked but was potentially confusing. So the is a simple renaming of the concept. 'General Data' items can come from anywhere you like.

3. Up to 4 x General Data Items are now supported

Previously, a maximum of three pin data items could be captured and supported at the same time. The new release allows you to capture and chart up to four general data items. Ideal for use with products like the Sparkfun Weather:bit, perhaps!


Plotting simulated data transmitted from user code

4. Accelerometer data is now captured in milli g force

Previously this data was captured in units of g.

5. X-axis scaling options

Previously, your chart would fill and rescale automatically as new values were acquired. Now you choose to have the chart scroll without rescaling. Have a play with this feature to see its effect.


That's all, folks!


Saturday, June 8, 2019

Bitty Controller 3.0.0 - micro:bit, Arduino and beyond!

Bitty Controller 3.0.0

The Bitty Controller application was designed for maker projects involving the good old BBC micro:bit. But it's always been possible to use it with boards, micro-controllers and computers other than the micro:bit. And with the new release 3.0.0, using it with non-micro:bit devices just got even easier.

The Dual D-Pad UI

Bluetooth

Bitty Controller uses Bluetooth to communicate with remote devices. It sends information about what the user is doing (e.g. the top button in the right hand group was just pressed and then was released) over Bluetooth and in a defined format. The code on the other device has to receive, decode and react to this in whatever way you, the creator of the maker project, want. Maybe you'll want a wheel to start turning or maybe you want to flash an LED. Whatever the response to a user action should be, only you can decide and implement it in your code.

Bluetooth Low Energy (LE), the type of Bluetooth used by the BBC micro:bit and other popular devices like Arduinos and the Raspberry Pi, takes an approach to defining remote interfaces using constructs called Services, Characteristics and Descriptors. The Bitty Software Beginner's Guide to Bluetooth LE describes this quite well, so I won't repeat it here. But the BBC micro:bit has its own set of services (etc), most designed by Martin Woolley (yours truly, in other words!) when he was involved in the micro:bit project a few years ago. A collection of services and the rules for using them is typically known as a Bluetooth 'profile', by the way. The micro:bit Bluetooth profile includes services which Bitty Controller uses for bidirectional communication with a micro:bit.

But what if you want to control a device that uses something other than a micro:bit?

The digital switches UI

Imitating a micro:bit with the micro:bit Bluetooth profile

What's to stop a developer from implementing exactly those micro:bit services on another type of device? And would an application like Bitty Controller be able to tell it was communicating with something which had the same Bluetooth services as a micro:bit but was in fact not a micro:bit?

The answer to the first question is....nothing.

The answer to the second question is.... no. Not if you do it right.

So, your first option for using Bitty Controller with something other than a micro:bit is to implement the required Bluetooth services on your chosen device type.

The analog touchpad controller UI

The Bitty Software GitHub repositories

Bitty Software recently set up some repositories ("repos") on GitHub. Over coming months, we'll publish example code for various types of device, showing how to implement the BBC micro:bit profile on devices which are not micro:bits, so that you can use Bitty Controller and Bitty Data Logger with those devices. See https://github.com/bittysoftware/bitty_controller_device_code for what we have for Bitty Controller so far.

The enhanced touchpad UI with cells for sensor data and a handy button

Introduction the HM-10 style serial profile

Some maker boards do not have Bluetooth, themselves. So if you want Bluetooth, you have to connect an external Bluetooth module, a system on a chip, which allows your board to use Bluetooth. Usually such modules connect to your board's GPIO pins or similar.

There are numerous external Bluetooth modules available, with various designs. The HM-10 is a particularly simple and affordable one. It connects to GPIO pins and uses serial communication to pass data back and forth with the connected board. It's not easy to programme though, so rather than programme it to give it the Bluetooth services you need, instead it comes preprogrammed with one service, containing two characteristics. You use one characteristic to write data from the remote device to the device the HM-10 is connected to and the other allows the HM-10 connected device to transmit data over Bluetooth to the other device. It's like sending and receiving messages.

You can send and receive any type of data you like. You define what the format is in terms of messages and message layouts and your code has to formulate messages and receive and decode them (and then react to them).

The touchpad UI with up to 12 configurable buttons

Bitty Controller and the HM-10 style serial profile

Release 3.0.0 makes it possible for you to choose whether Bitty Controller should use the micro:bit Bluetooth profile or the HM-10 style serial profile.

New - Profile type selector in the Options screen

And this, of course, means it's possible to use Bitty Controller with all sorts of remote devices!

Take Roger Wagner's Hyperduino, for example. This is a very cool piece of kit. The Hyperduino consists of a clever daughter board which makes some potentially complex connectivity and electronics scenarios a breeze to set up. It works with an Arduino Uno and for Bluetooth, uses a connected HM-10.

Roger Wagner's Hyperduino and a connected HM-10 Bluetooth module

HM-10 and Bitty Controller Messages

Bitty Controller has defined a number of message types so that it can convey user interaction information via the HM-10 and can receive data, such as might have been acquired from sensors, from the board the HM-10 is connected to. All messages start with a single byte opcode, whose value defines the type of message. This is then followed by one or more other bytes, depending on the message type. We've published a template Arduino sketch which should make it easy to use Bitty Controller with Arduino-based maker projects. The README file includes details of the messages and their format. See https://github.com/bittysoftware/bitty_controller_device_code/tree/master/arduino/Arduino_with_HM10_serial_template

Happy Making!

That's it! Watch out for updates to the new GitHub repo and good luck using Bitty Controller with you micro:bit and non-micro:bit maker projects.


Friday, February 15, 2019

The Beginner's Guide to Bluetooth

I sometimes get asked for recommendations on things to read which will help people learn about the basics of Bluetooth, particularly as it relates to the BBC micro:bit. To that end, I've written a "beginner's guide" and released it today. Hope it helps!

http://bittysoftware.blogspot.com/p/bluetooth-for-beginners.html


Sunday, February 3, 2019

Bitty Blue 1.2 - Message Display

Bitty Blue has a new feature called Message Display. It's a very simple idea but one which has a lot of potential. You can now send a text message over Bluetooth to Bitty Blue and it will be displayed. From the user interface, you can change the font size, the background and text colours and you can decide whether the text should be scrolled or not. If scrolling is switched off, sending more text from the micro:bit will replace the current text. If scrolling is enabled, new text will be appended to the current text.

So what might you use this for?

You could use your smartphone or tablet as a graphical console for monitoring your micro:bit code. You could display messages when something significant happens (but checkout Bitty Event Monitoring in BittyWeb for that as well) or display some kind of internal data like the angle a servo has been rotated to. You could even use the feature to help you track down problems in your micro:bit code but sending messages containing the value of an important variable at points in your code!

Sending text involves using the Bluetooth UART service so you must make sure that service has been included in your code, usually from an "on start" block. Then all you need to do from a MakeCode project is use the "bluetooth uart write string" block to send your text. Here's an example.


And here's what you see on your phone when (in this example), button A has been pressed.


Simples :-)

micro:bit V2 - key information